Fill & Exercise Builder
The Fill & Exercise Builder creates fills and exercises the way a drummer actually thinks about them — subdivisions and sticking first, then accents, then voice routing. Every decision is musical. 36,700+ sticking patterns, 18 accent shapes, 11 voice strategies. Build a fill that resolves into a groove, or an exercise — the same pattern looped back-to-back with no beat bars, practice-pad style.
Step 1: Setup
Frame the fill first: time signature and how much of the bar the fill occupies. If you'd rather not build from scratch, tap Choose Preset — 45+ fill presets you can load and then tweak through the rest of the wizard.
Step 2: Beat Subdivisions
Set the subdivision for each beat of the fill — straight 16ths all the way through, or mix it up beat by beat: 16ths into a triplet into 32nds. Mixed subdivisions are where fills stop sounding like recycled patterns.
Step 3: Sticking
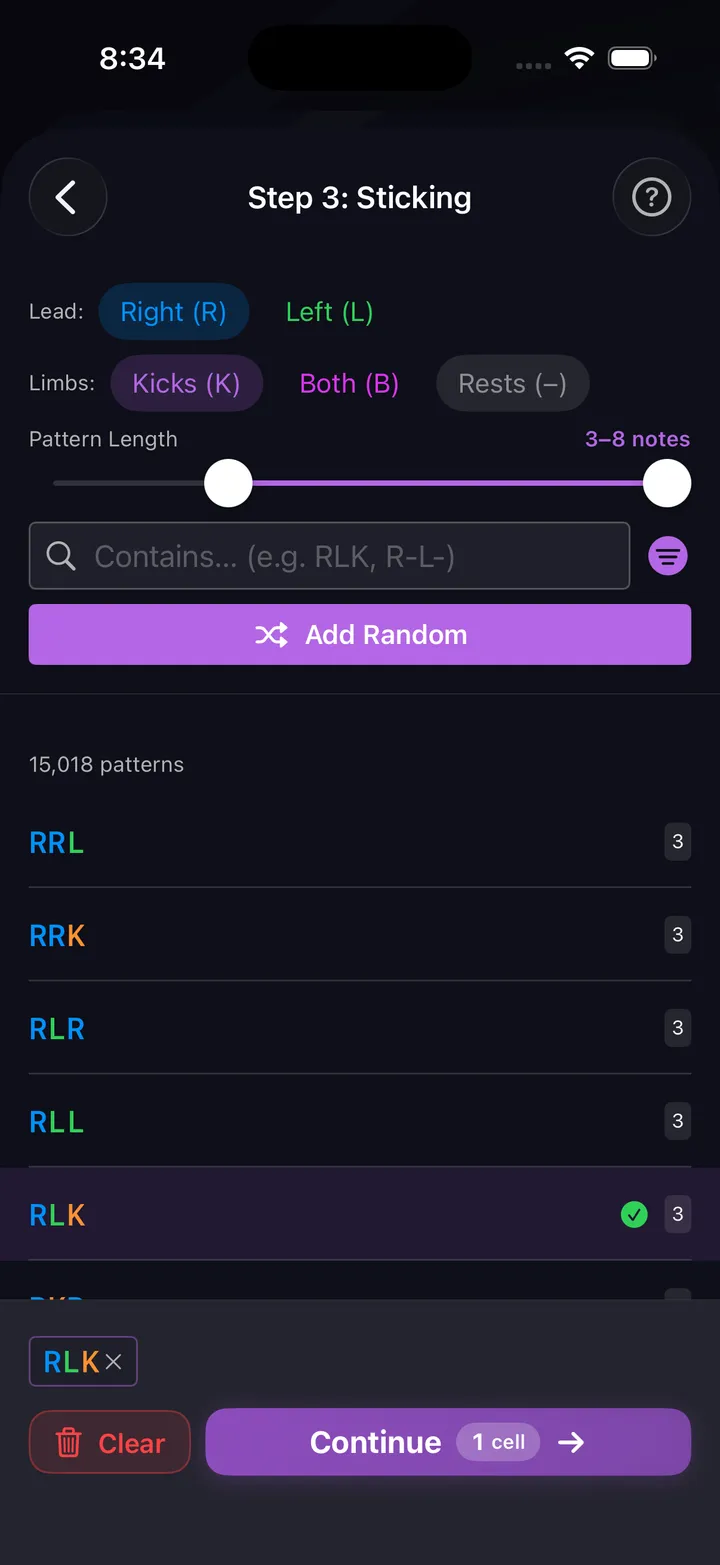
Choose the sticking pattern — the sequence of right (R), left (L), kick (K), and both (B) hits. Filter by limb type, pattern length, and sticking difficulty (Beginner → Expert), search for specific sequences like "RLK" or "R-L-", or tap Add Random to explore. The library holds 36,700+ patterns. Select multiple cells to chain them together. Or tap a voice and apply a preset across the whole bar in one tap — All Right, All Left, Alternating, Paradiddle, Doubles, Paradiddle-diddle, or your own custom pattern — to a single voice or every voice at once for kit-spanning linear fills. It's undoable, so experiment freely.
Step 3, continued: Preview
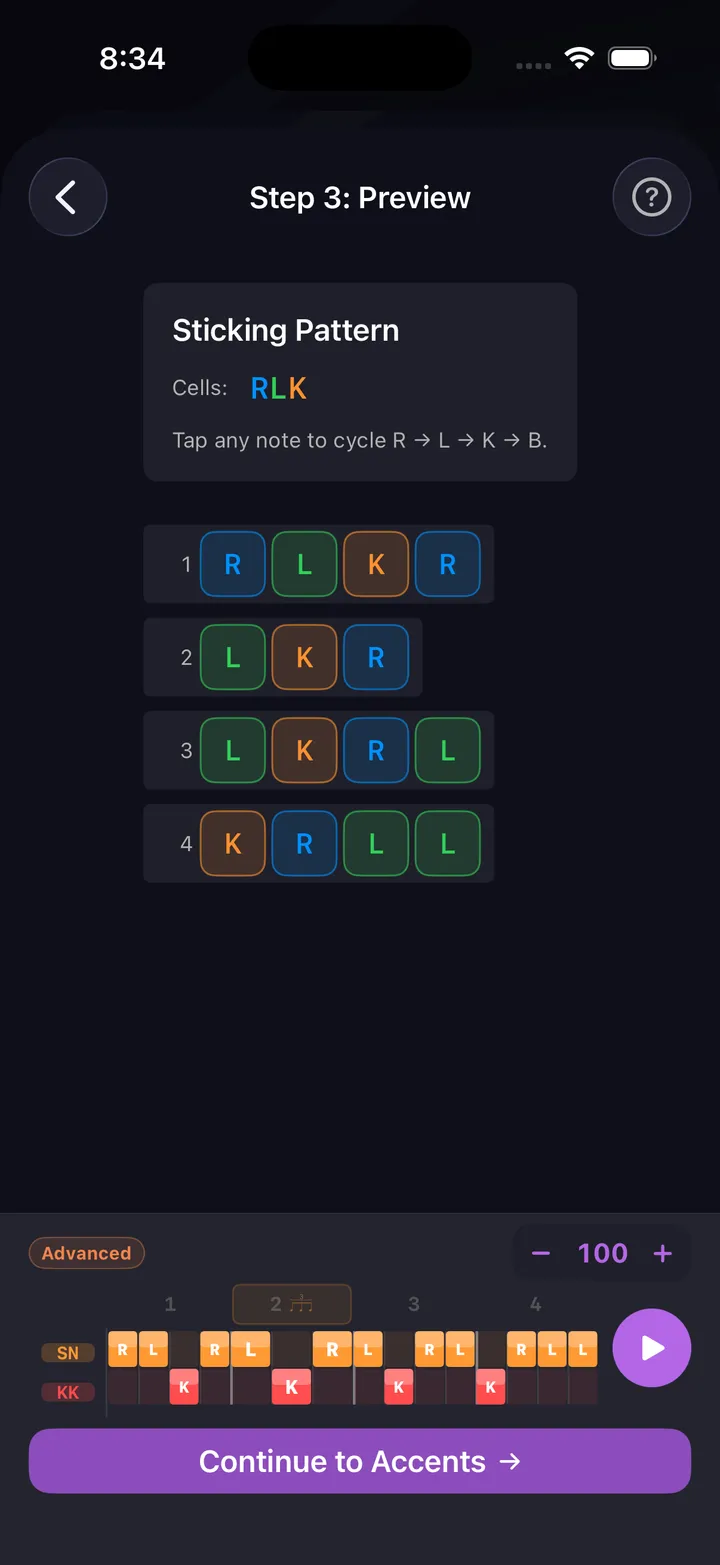
Sticking and preview share step 3 on screen. See exactly how your selected sticking lays across the bar. Tap any note to cycle it through R → L → K → B. The mini grid at the bottom shows the full fill pattern in real time. Tap Continue to Accents when satisfied.
Step 4: Accent
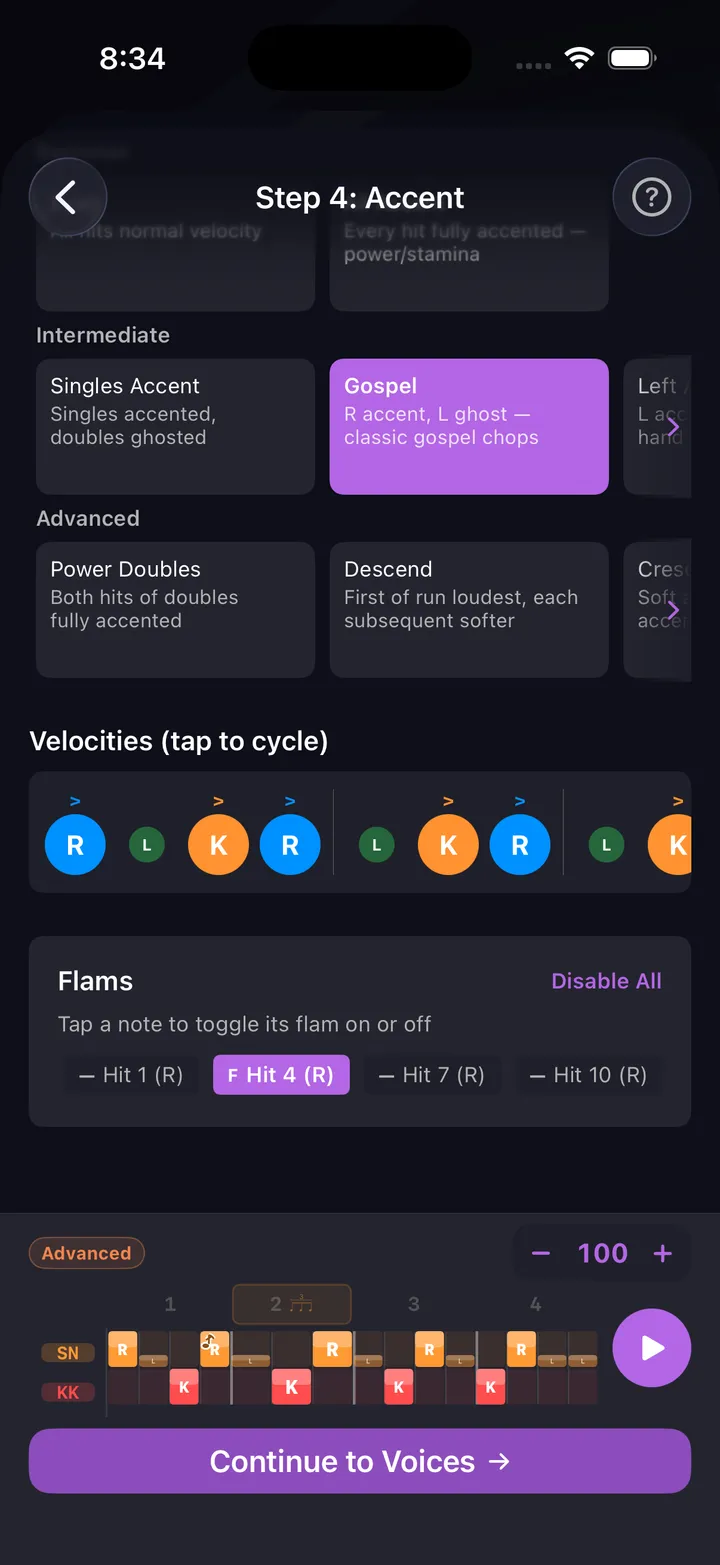
Choose an accent shape — which hits land loud versus soft. Options are organized by difficulty:
- Beginner: Even, All Accent
- Intermediate: Gospel (R accent, L ghost), Left Accent, First of Run, Last of Run
- Advanced: Power Doubles, Descend, Crescendo, and more
The Flams section lets you toggle flams on individual hits for extra texture. The Velocities row shows the resulting accent pattern on every note.
Step 5: Voice
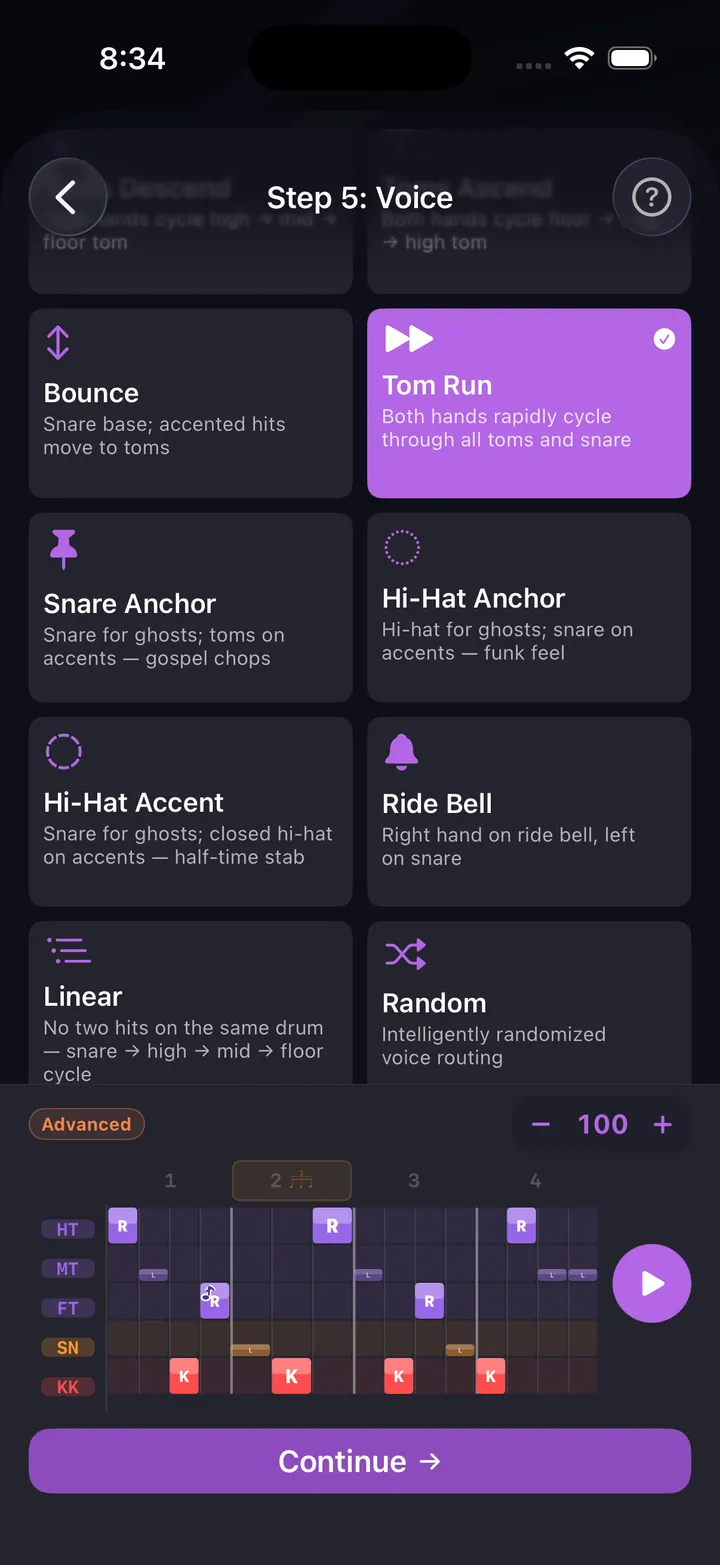
Choose where each hit lands on the kit — the voice strategy determines the physical character of the fill:
- Toms Descend / Ascend: Both hands cycle through the tom voices
- Bounce: Snare base, accented hits move to toms
- Tom Run: Both hands rapidly cycle through all toms and snare
- Snare Only: Everything on the snare — pure hands, pad-friendly
- Snare Anchor: Snare for ghosts, toms on accents — gospel chops feel
- Hi-Hat Anchor: Hi-hat for ghosts, snare on accents — funk feel
- Hi-Hat Accent: Snare for ghosts, closed hi-hat on accents — half-time stab
- Ride Bell: Right hand on ride bell, left on snare
- Linear: No two consecutive hits on the same drum — snare → high → mid → floor cycle
- Random: Intelligently randomized voice routing
Step 6: Hi-Hat Foot (Optional)
Keep the left foot working under the fill — chick on 2 & 4, quarter notes, offbeats. Fills are where hi-hat foot time usually falls apart, so practicing it inside the fill is the fix.
Feel (Optional)
The final step before saving: swing or shuffle the fill, and add per-voice pocket — micro-timing that pushes or lays back a voice, on ghost notes only or every note.
From pattern to drill
Tap Done to save, then open the pattern as a drill. In fill mode the drill plays a groove for a configurable number of beat bars, cues the fill, crashes on the downbeat, then returns to groove — on repeat. In exercise mode there are no beat bars: the pattern loops back-to-back with no crash, the way you'd run a rudiment on a practice pad. Set beat bars to zero (or pick Exercise up top) to switch. Either way, use Practice Steps to build it up progressively: sticking only first, then add accents, then full voice routing.
Tips
- Start with a 4-note sticking (RLRL or RLRK) before building longer patterns.
- The Gospel accent shape transforms almost any sticking into something musical.
- Snare Anchor voice + a gospel chop sticking is a great default for intermediate players.
- Use the builder's AI (beta) to draft a fill or exercise from a description, then study how it's constructed.